


The Avid Embroiderer Presents, KP Compositions, February 19, 2009
When I first looked at Ken Parson’s Compositions, I was confused by it, not because it was difficult in itself, but because I had never seen anything like it before. Once I had a grasp of the features, I must say, I am so impressed. I hope you will be as well! This software can do so much for your projects and I will try to explain most of them for you. (Not in any order)
Even if you cannot digitize, you can rework your design to be really individual.
The software automatically adds ‘pull compensation’ and ‘underlay’ to ensure the quality of the finished product.
Resizing in ANY amount-not just the 20% standard resize recommended, rotation and mirroring of designs are a snap.
Gives excellent recommendations for needles, stabilizers and thread.
Repeating of designs, especially in a ‘pattern’ is automated; and, those colors are set to significantly reduce thread changes.
Import and export of newly created designs, in most available formats, are simple.
Splitting of designs is automated.
Add an autobaste for your project if you desire.
Use slow draw to see just how the design will sew out.
Instant lettering and/or monogramming is available and easy to use. (Available in English, French or Italian)
Two manually digitized lettering sets at 4mm. (24mm is approximately 1")
The more I play with the software, the more things I find I am able to do.
Well, I could go on, but instead, you can walk with me through a simple project.
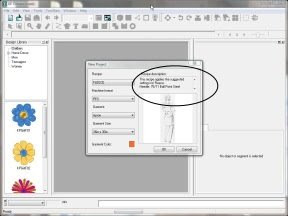
I am making a kitchen towel as a gift for Valentine’s Day. After opening KP Composition, it asks me for a new or existing project. I select ‘new’ and it asks me some questions. In photo #2 I tell the software my fabric is a (velour) towel in the PES format, it is a towel, and the size is even listed. I can indicate the color but the really interesting section is the ‘Recipe Suggestions.’ It recommends the needle, thread, topping, backing and lets me know that it will be making some adjustments for the ‘pull’ of the design.
I don’t have to use the recommendations, but I find them to be very good. However, I will use a stronger backing, because that has been best in my experience.
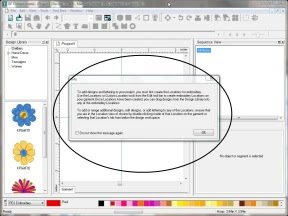
Next, it gives me information regarding the ‘location’ area. It lets me know that I need to be in that location area to do tasks. Without this information, I would have not been able to get to the first stitch. I am pleased that the programmer helps me to understand the rules. The next photo shows the overall layout of my project.
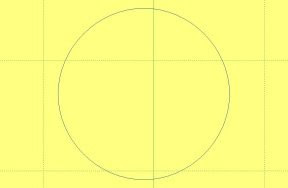
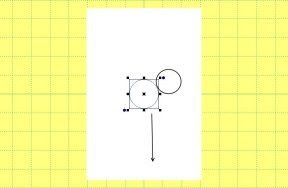
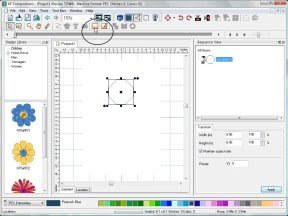
From the ‘toolbar’ (circled) I can select a template of the ‘location’ style or design my own. I choose a circle from the template. Notice that the ‘handles’ around the location show that I have selected the location. In the second photo, I am moving the ‘location’ down toward the bottom of the towel. In this case, it is not a big issue; however, if I were doing a man’s shirt, it would be important. The circle in the 2nd photo is the handle with which you can rotate your design which is handy.
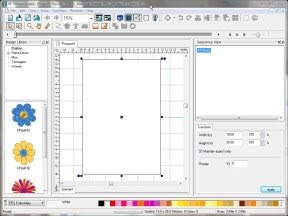
Now that the location is in position, I double click on it so that the area is ‘full size.’ I could have used the “View Menu” as well. TIP: You may see that if you don't make this full size, you cannot merge/import designs. In photo #2, I select “Merge Stitch File” from the File Menu. Or, I could have used one of the designs from the left side of the screen. From my designs, I have selected a ‘Saying’ that I got from ca few months ago. I like it because the font is different and it says “Eat Chocolate,” my favorite motto. . . .
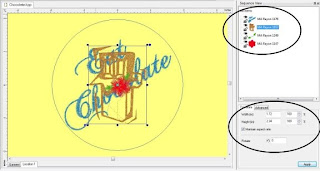
My design is in the location and in the 2nd photo, I have selected the hoop from the toolbar. That will let me know that I am within the area of my desired hoop. TIP: If you don't use the correct hoop size, and stay inside it, you may have error messages later when trying to do a sewout. I may have to adjust some of the pieces of the designs. In the right side of the screen, there is a Sequence View indicating that ‘Eat Chocolate’ will be the first item to sew out. If I prefer, I can have it sew out in a different order by selecting the specific item, and move it in the Sequence View. Doing likewise, with a piece of a design (single or multiple colors) I can remove, duplicate and rotate the piece. So, if I had a single leafy branch, I could make dozens of that part only and change each of them a little bit thereby making them a bouquet of leafy branches!
I rotated ‘Eat Chocolate’ and I have brought in the 2nd and 3rd design in the same manner as the first. The Sequence View shows the new items and how they will sew out. You can also see the ‘properties’ of the 2nd design because it is selected (handles are in view). Any adjustments in size or rotation can be made in either of the property (lower right) or selected areas (using the box handles). For instance, if I make the (abstract) chocolate bar smaller, the software will automatically decrease stitches and vice versa.
Next, I am going to make the chocolate bar a lot smaller. The 'rule of thumb' is never reduce or expand a design more than 20%. In this case, I am making it about 35% smaller because the software automatically reduces stitches AND, if I think it is still too dense, I can further reduce stitching in the Properties/Advanced selection. That can be significant when you are doing baby designs for infant clothing!
I am using the ‘Circle Template’ to add more bars to the design. They will be exactly spaced and placed. I will do the same for the small flower I am using in the design.
Everything is still inside the hoop and I just want to be able align everything to the center of the hoop. I use the toolbar and select the ‘align’ icon. I can still move/rotate the chocolate bar or flower, the software is so flexible.
I am ready to save and sew out my new design. To save the project, use the File Menu and select ‘save as.’ To save the design, in the File Menu, select ‘Export Stitch File’ and save it with your other designs or wherever you want it. Since you have previously selected your format, it will automatically save in that format.
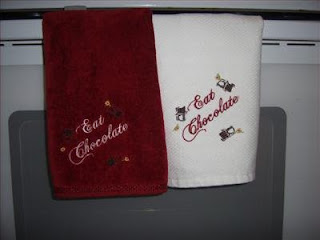
These great towels are from AllaboutBlanks, the red is absolutely gorgeous and the white a true white!!!
Here are a couple of other designs I created. It was fun once I had a good handle on what to do to build my ideas.
Before and After - Sorry about the photos, they are drawings, the stitching is appropriate.
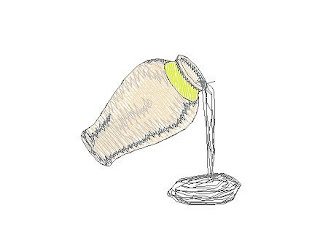
Here is my attempt at adding some freehand stitching - I NEVER SAID I COULD DRAW!! The pitcher is from Composition Software which I rotated and added water spilling out. I am just having fun with this software.
As with most software, there are multiple ways to complete a task; these are my methods and I hope you find them useful for you. You have nothing to lose, there is a 30 day free trial and keeping the above info in mind, you are going to have a lot of fun! This is a good value for your dollars, you can do so much with it. No more 'bullet proof' density or rotating problems!
Vist the Avid Embroiderer at http://www.annthegran.com/cs/blogs/avid-embroiderer/archive/2009/02/19/the-avid-embroiderer-presents-kp-compositions-february-13-2009.aspx
Labels: The Avid Embroiderer Pat Snyder

0 Comments:
Post a Comment
Subscribe to Post Comments [Atom]
<< Home