Labels: Designs Copyrights
Tuesday, July 31, 2007
There is always some confusion out there about what you can and cannot do with the embroidery designs that you purchase. I think the best way to explain this is to say that when you purchase a design you are not exactly purchasing it. What you are doing is purchasing the right to embroider that design, and that is all. You cannot make a copy of that design for a friend, that is illegal and a crime punishable by law. Even if you get that design online for free, it is still just a license to embroider the design, you do not have the right to copy the design and give it or sell it to anyone else. The only designs that you own are the designs that you digitize yourself. Please keep this in mind the next time someone asks you to give them a copy of one of your designs and please say, I'm sorry but it's not possible but I would be glad to direct you to the proper place to purchase it.
Monday, July 30, 2007

Compositions project based embroidery design software has an automatic function for placing designs on a neckline. All you need to do is choose the design you wish to place on the neckline, Click on the necklines icon, choose the neckline type and the software automatically spaces out the design on the neckline. You can then go in and adjust the size and placement to perfectly match the garment upon which you are placing it. It is quick fun and easy.
Labels: Necklines
Friday, July 27, 2007

In the project above I combined floral designs from my "Fabulous Florals" collection and combined them with three different ribbon designs from my borders collection entitled "Dress Up Your Designs". I used two different triangular shaped placement areas to make the design wrap around the left leg hemline and taper as it moves up to knee.
Labels: Pants leg project
Thursday, July 26, 2007


In the example above I assembled some of the designs from my "Fantasic Flora" Collection to create a design inspired by the bodice design from the Givenchy gown made famous by Audrey Hepburn in the movie "Sabrina".
You can often find inspiration for your original designs in the fashions of the past. Take a second look at fashions that have caught your eye in the past and see how you can be inspired to create updated looks that are perfect for today.
Wednesday, July 25, 2007

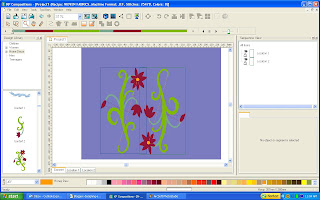
While Compositions project based embroidery design software offers an automatic design splitting wizard to walk you through the steps of splitting a large design into smaller designs to fit into any multiple placement hoop, there are times when you want to regain a larger amount of control of how it actually splits it up. In those cases you can manually split up the design by following the steps below.
1. Choose 2 or more location areas.
2. Using the transform box change the size of the locations to match your hoop size.
3. Overlap the two locations to mimmic the overlap in the multiple hoop.
4. Place your designs in both locations so that they both occupy the overlapping area but make sure the stitching doesn't overlap.

5. To the left you can see how while both designs occupy part of the other location, none of the stitching overlaps. This method allows you to create a large design in a multiple hooping while still retaining control of how it is broken up.
Labels: Splitting designs
Tuesday, July 24, 2007

In the above design I combined lettering (the name of a boat) with the compass design from my "Anchors Away" collection. In order to make sure everything was even and centered I selected all of the components of the design and used my Align vertical center tool and the lettering was centered with the compass and both sides even with each other. Of course any of the designs in the collection would have worked equally well. While I chose to embroider on a boat towel, this could be placed on a beach towel, pillow, or even slip covers for your boat seats or outdoor furniture.
Monday, July 23, 2007

There seems to be a little bit of confusion about exactly how to use my "Create A Crest" Collection. So I put together a very simple crest which you can see above. The design consists of a red and gold basic crest, combined with the Knight flourish on the top and I also added crossed tennis rackets and a diamond monogram. Of course if your interests are other than tennis you could have used the polo mallets, golf clubs, yacht or just a fleur de lis or star. There are unlimited combinations of the components which can create the perfect crest for anybody with any interest.
Labels: Create a Crest
Friday, July 20, 2007
Good embroidery design is as much a result of the proper choices in the area of stitch types, densities, stitch direction, proportion and color choices as it is a result of an initial design choice. What I mean by this is that you can take beautiful artwork and autodigitize it and end up with a flat boring and uninspired piece of embroidery. Especially if you are using autodigitizing software it is usually essential to go back afterwords and make some editing changes to truely make your design come to life. Embroidery is a textual artform and needs to be approached from that angle. It is important that you remember that the way the light is reflected off of the stitches is going to add to the 3-dimensionality of the overall design. The more variety of stitch types, lengths and directions, the more interest and life the design will have. so keep these aspects in mind as you are creating your next design and you will see a marked change in your results.
Labels: Design
Thursday, July 19, 2007

In the example above I used the automatic circle template tool to create a circular border from the pineapple in my "Perfect Produce" collection. I then added the letter S on a 45 degree angle in my "Whisper" font. I thought the pineapple would be appropriate to use on this corner napkin design as it is the symbol of welcome. You could also take this one step further by embroidering a larger version of the design on the center and four corners of the tablecloth.
Tuesday, July 17, 2007

When placing embroidery on the left chest of a Men's T-shirt you can assure it will be properly placed by measuring 8-9" depending on the size (S,M,L) from the shoulder seam and 4-5' from the center of the T-shirt. The design that you choose should be less than 3.5" across or you will hide some of it under the sleeve.
Labels: Left Chest Designs
Monday, July 16, 2007

The perfect accessory for your summer home is this quck and easy to create shell pillow. While most of my designs are created so that you can use your creativity to combine them together or with lettering to create you own unique designs, my shell collection (Seaside Memories) work just fine on their own. Choose your favorite and
place it front and center on a pillow to add a touch of the seaside to any room.
Friday, July 13, 2007

In the design above I combined two borders from my "Dress up your Designs" Collection wih grapes from my "Perfect Produce" Collection to create a border design for a drapery panel. The design can then be reversed for each alternate hooping creating more interest. In order to make sure all of your hooping are even you can use a disappearing pen to draw a line on the fabric and match that up with permanent marks on your hoop or mark your hoop with tape for a less permanent solution. To see all of my designs go to www.kenparsonsdesigns.com
Labels: Drapery Repeat
Thursday, July 12, 2007

Adding embroidery to a garment is a great way to bring attention to a specific area or detail on the garment. In the example above I used two designs from my border design collection entitled "Dress Up Your Designs" and combined them with a rose from my "Fantastic Florals" collection and placed them on the gore of a skirt. While the asymmetrically placed gore acts as a focal point of the skirt's design, the addition of embroidery gives it even more importance. To see these collections in their entirety go to www.kenparsonsdesigns.com
Wednesday, July 11, 2007

The design above was created for a teenage girl's beach towel. I used the makeup designs from my Flash and Fantasy collection and combined them with a 4.5" monogram in the center. I divided the design into three separate hoopings, the left, right and center (monogram). You can print out each one of the hoopings prior to sewing to check your actual placement on the towel. To try out Compositions software for 30 days for free and design your own towel design go to www.kenparsonsdesigns.com
Labels: Embroidered Borders
Tuesday, July 10, 2007

One of the hardest design decisions for embroiderers to make, when first embarking upon designing for fashion is the choice of a color scheme. Of course, you can use the color of your base fabric as a point of departure, but what if you are starting from scratch and you don't even have that. My suggestion is to go shopping and see what catches your eye. If you like color scheme on a dress or a blouse or even a tablecloth you will probably like that color combination in you design.
Labels: Inspiration
Monday, July 09, 2007

If you look at any fabric or wallpaper design and will notice that it is composed of lots of smaller designs combined together to create a larger and more complex design. This is the basic concept behind Compositions project based embroidery design software. In the project above I combined three shoes from my "Fancy Footwork" collections and paired them with 50's styled geometic shapes. The result is a rhythmic design which is much more interesting and untique than any of the components would be alone. To see the entire collection go to www.kenparsonsdesigns.com
Tuesday, July 03, 2007

One of my favorite reasons for adding embroidery to a garment or living environment is to take a look from a previous era and emulate it in a new embroidery design. In the example above I tried to recapture the look and feel of the 80's. By using the records and guitars from my "It's A Boy's" Life collection and combining them with lettering (Rock A Billy an 80's musical genre)I created an asymmetrical design covering the right shoulder left back and right sleeve. This is a design that is interesting from all angles: back, front and side. It is much easier to impart a recognizable look when you use lettering as a key.
See the entirs collection of designs at www.Kenparsonsdesigns.com
Monday, July 02, 2007

In the example above I digitized a simple square shape, I then changed the density type to a convex. This varies the density so that it is less dense in the center and more dense at the ends. I then copied and pasted the square and turned it on its side. The next step was to place exactly on top of my first square. As you can see this result in a softening of the square shape making it look three dimentional and rounded. This ia a great way to get dimension in your designs while at the same time keeping your stitch count down.
Labels: Density

